- Главная
-
Учебник
- DIALux 4
- DIALux evo
- IES
- Форум
- Галерея
- Блоги
-
Скачать
- DIALux
- Базы
- Плагины
- 3D модели
- Текстуры
- Книги
-
Новости
Illumination Conditions Wizard
10 сентября 2012 - Админ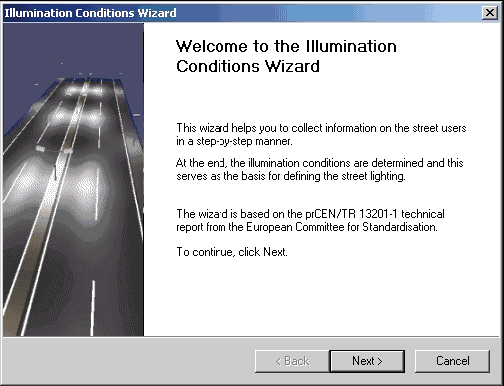
Fig. 333 Illumination Conditions Wizard – Welcome dialogue
You can set the typical speed of the main user by selecting from four options. Please confirm each of your steps by clicking on Next.
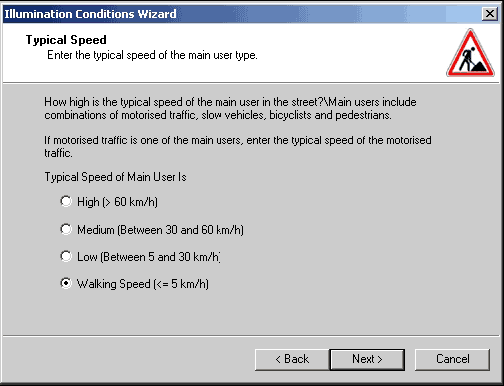
Fig. 334 Illumination Conditions Wizard – Typical Speed
Specify the permitted traffic participants in the window Main Users and Other Users.
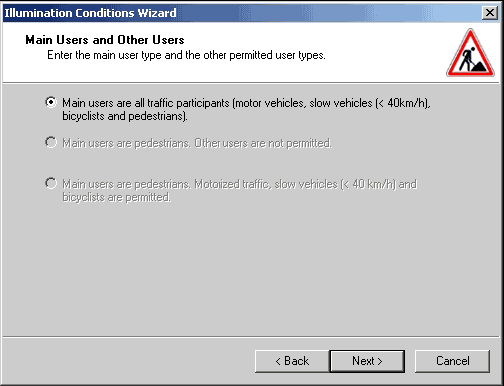
Fig. 335 Illumination Conditions Wizard – Main Users and Other Users
Afterwards a final dialogue appears with the information of the determined illuminance condition.
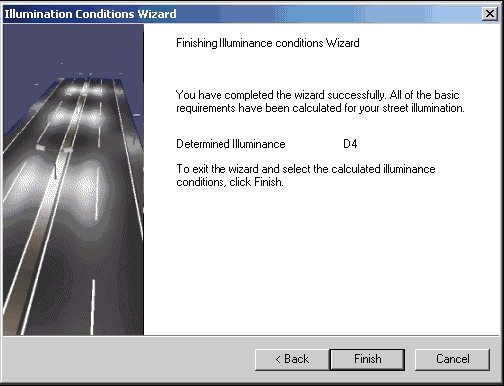
Fig. 336 Illumination Conditions Wizard – Final dialogue
After finishing the wizard DIALux incorporates directly the illuminance condition in your street project.
The wizard has already considered which kind of roadway element you have selected. For example, typical requirements of the roadway do not appear with a sidewalk.
The user has the option to determine the maintenance factor in the Property Page maintenance plan method.
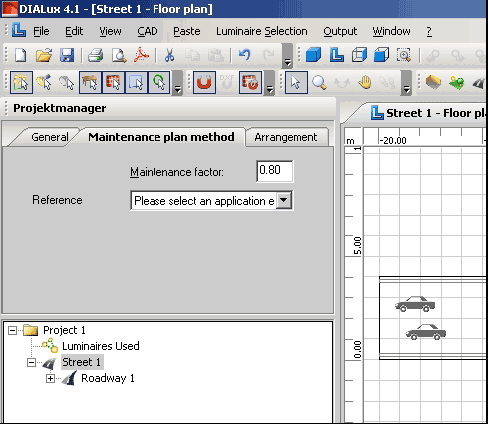
Fig. 337 Maintenance plan method
A standard street may contain certain street elements, which you can add, sort or delete in the Property Page Arrangement. To sort the street elements (e.g. sidewalk, bicycle lane, lay-by,…) you can select one of these and use the Up or Down buttons (see Fig. 338).
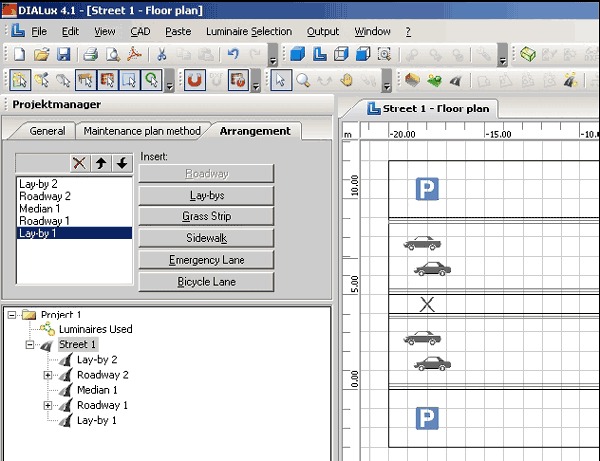
Fig. 338 Insert and arrange the street elements
Optionally you can insert street elements in the menu Paste → Street Element
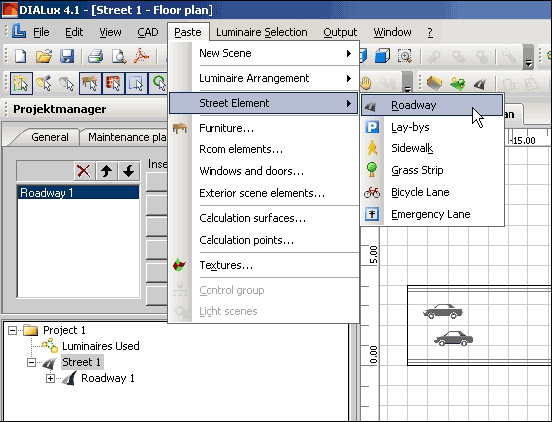
Fig. 339 Insert street elements via menu
or by means of the right mouse in the context menu of the street.
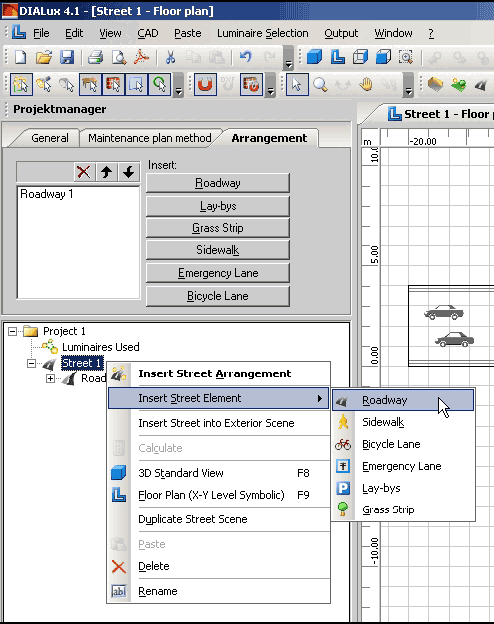
Fig. 340 Insert street elements via context menu
When you select a single street element in the Project manager or in the CAD view, you can see and modify the properties in the Inspector.
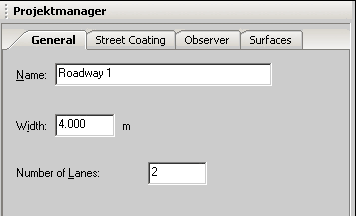
Fig. 341 Properties of a roadway – General
For example the properties of the roadway can look like:
• Width: 4.000m
• Number of lanes: 2
• resulting width of a lane: 2.000m
The tarmac and the luminance coefficient can be modified in the Property Page Street Coating.
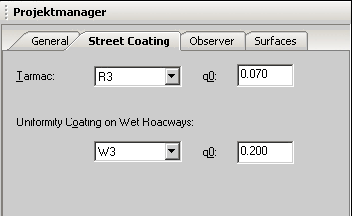
Fig. 342 Properties of a roadway – Street coating
Each street has an observer whose average age can be varied individually for the calculation of TI.
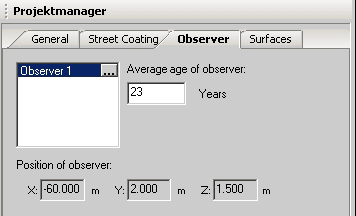
Fig. 343 Properties of a roadway – Observer
DIALux positions the observers automatically according to the default of the EN. The observer is always 60m in front of the valuation field in the middle of the respective roadway, at a height of 1.5m above the ground. Normally every roadway has an observer who looks in the direction of the driving direction. On the basis of the resulting symmetries a rotation of the observation direction is not necessary.
The Property Page Surfaces offers the possibility to set material, texture and Raytracer Options. All settings only have an effect on the visualisation, but not on the calculation results.
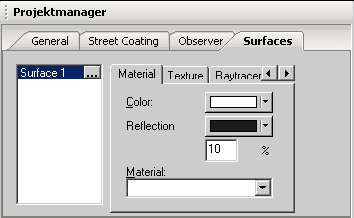
Fig. 344 Properties of a roadway – Surfaces
In the default setting median, parking lane and grass strip have no valuation field. Nevertheless, this can be inserted, while the respective street element is marked in the Project manager and with the right mouse button the option Insert Valuation Field is chosen.
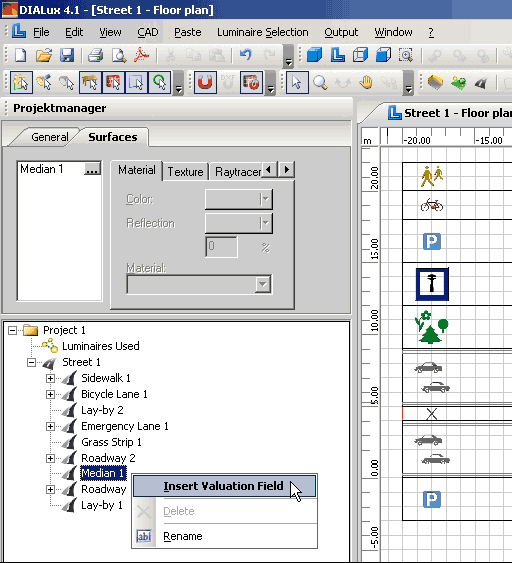
Fig. 345 Insert valuation field via context menu
Similarly a valuation field can be deleted or renamed by means of right mouse button.
The new EN allows the use of common valuation fields for different roadway elements. In the wizard this is possible by choosing the suitable checkbox. If additional validation fields are selected several more steps are necessary. DIALux defines for every surface (except median, parking lane and grass strip) a valuation field. Now if you want to have, for example, a bicycle lane and a sidewalk with a common valuation field, you must first cancel the existing valuation fields. Then select both roadway elements for which you would like to have a common valuation field by pressing the shift key and clicking those roadway elements. Then do a right-click on the marked objects and choose Insert Valuation Field. Now you will get a common valuation field for both roadway elements.
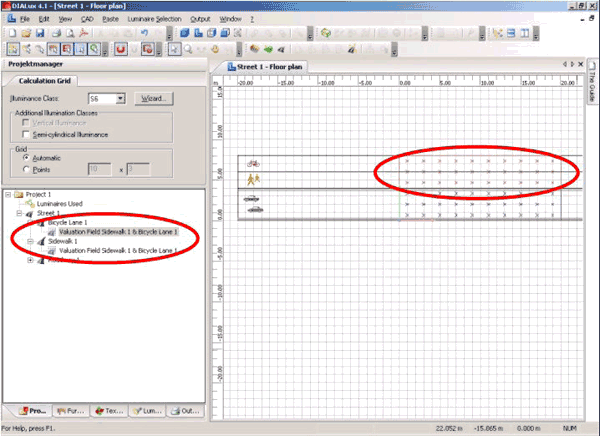
Fig. 346 Common valuation field
If you mark a valuation field in the Project manager, the Property Page calculation grid opens in the Inspector.
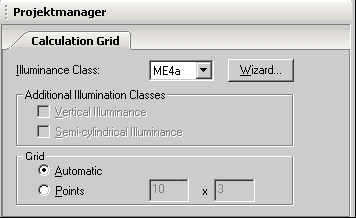
Fig. 347 Calculation Grid
The grid is generated automatically according to the EN13201. If the checkbox "Automatic" is chosen, the right number of calculation points is always chosen. If you want a grid different to the standard, here you can give the number of the calculation points in the X direction (longitudinal direction of a roadway) and the Y direction (width of a lane), after you have activated the checkbox "Points".
NOTE: Then the results are no longer according to the standard EN13201.
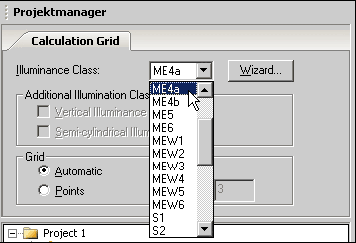
Fig. 348 Calculation Grid – Illuminance Class
Here you have the option to specify the illuminance class. Either the given illuminance class is selected manually from the available list, or by using the wizard to determine the illuminance class in according to the European Standard CEN/TR 13201-1. The illuminance class contains a summary of the photometric requirements for your project which depends on the visual needs of specific street users using different kinds of traffic surfaces and their environment. Additional illuminance classes can be chosen according to street situation for vertical and semicylindrical illuminances (q.v. EN13201 – 1, chapter 6.4).
For valuation fields requiring illuminances rather than luminances it can be necessary within the scope of the norm to calculate each of four illuminances dimensions dependent on the interpretation criteria according to EN13201-2. These are:
• horizontal illuminance;
• hemispherical illuminance;
• semicylindrical illuminance;
• vertical illuminance.
Horizontal illuminance is always calculated. However, in some countries hemispherical illuminance is needed instead of horizontal illuminance.
Similarly this is always calculated and can be selected in the output for the printout. In table 4 of the CEN/TR 13201-1 the alternative A-classes are specified for the Sclasses. Accordingly DIALux changes the necessary illuminance dimensions in the outputs.
Horizontal illuminance:
Calculation points shall be located in a plane at ground level in the relevant area.
Hemispherical illuminance:
Calculation points shall be located in a plane at ground level in the relevant area.
Semicylindrical illuminance:
Calculation points shall be located in a plane 1.5m above the surface in the relevant area. Semicylindrical illuminance varies with the direction of interest. The vertical plane at right angles to the rear flat surface, shall be oriented parallel to the main directions of pedestrian movement, which for a road is usually longitudinal.
Vertical illuminance:
Calculation points shall be located in a plane 1.5m above the surface in the relevant area. Vertical illuminance varies with the direction of interest. The vertical illumination plane shall be oriented at right-angles to the main directions of pedestrian movement, which for a road are usually up and down the road. You can activate the wizard for the determination of an illumination class via the wizard... button (see figure above). After starting it you are welcomed by a welcome screen.
NOTE:
The single steps to the calculation of an illuminance class by means of the wizard depend in each case on the kind of marked street element. The specific requirements for the illumination class are influenced by the kind of street user or the kind of street.
With the help of the following example we would like to explain to you the functionality of the wizard for the determination of the illuminance class of a street.Рейтинг: 0 Голосов: 0 5436 просмотровКомментарии (0)Manual
