- Главная
-
Учебник
- DIALux 4
- DIALux evo
- IES
- Форум
- Галерея
- Блоги
-
Скачать
- DIALux
- Базы
- Плагины
- 3D модели
- Текстуры
- Книги
-
Новости
Making videos in DIALux
11 сентября 2012 - АдминTo create a video with DIALux you have to define the camera path. First open the lighting design in the 3D window then use the command “File -> Export -> Save 3D video…”. Now a camera path appears in the CAD window.
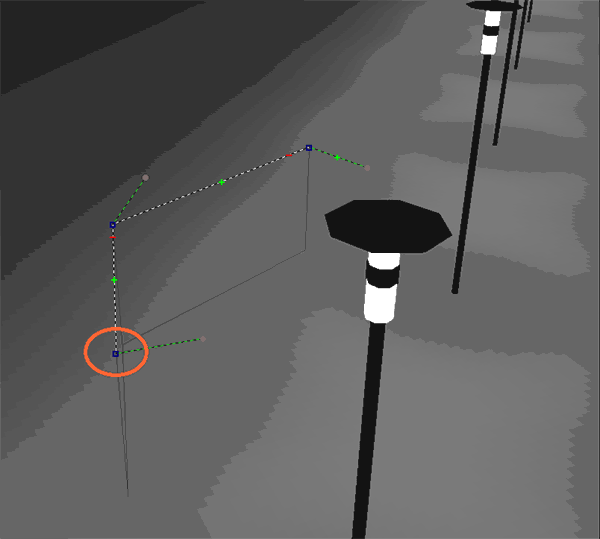
Fig. 440 Inserting a camera path in the 3D view
At the beginning, the end and at all inserted points of the path, the camera position in X and Y direction can be defined by left click and moving the mouse. The Z position can be changed by left click and holding down the control (CTRL) key.
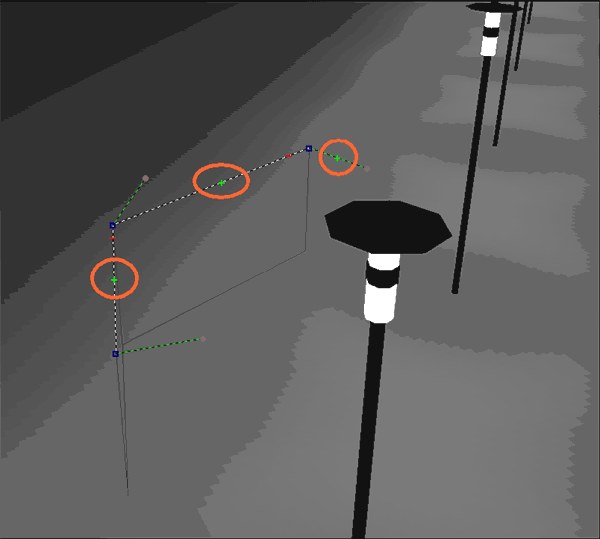
Fig. 441 Inserting additional camera positions along the path
Near to the end points and in the middle between two points there are green “+” symbols. By clicking on these symbols, a new point is inserted into the camera path. If the red “-” symbol is clicked, the associated point is deleted.
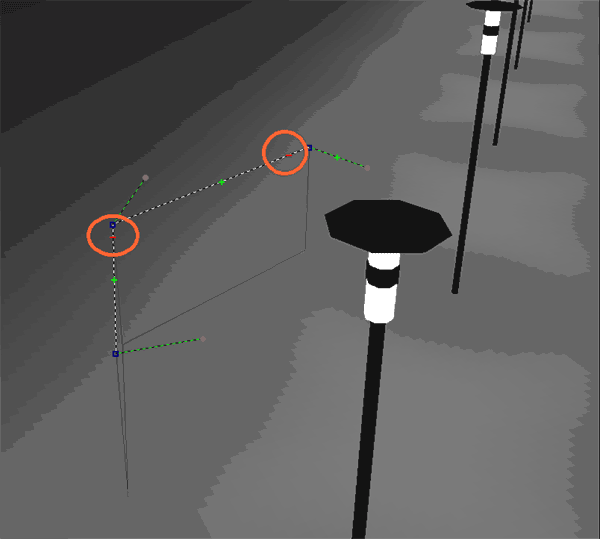
Fig. 442 Deleting camera positions
At all the points there are thin green lines drawn. These lines are defining the “viewing direction” of the camera. The small ball at the end of these lines can be moved with the mouse. To move into the Z direction hold down the control key.
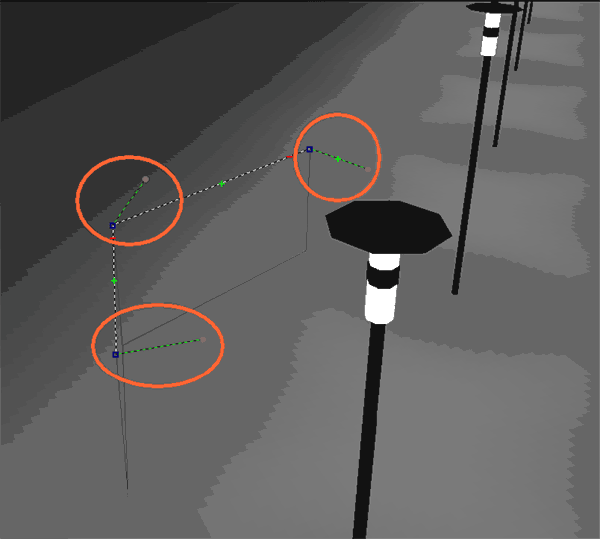
Fig. 443 Defining the camera viewing direction
The camera is moving along the path from point one to point two. It is turned during the movement according to the viewing directions in point one and two. If you want to have more rotations on the way from point one to point two, you have to insert more points directly on the path only changing the viewing direction and not the position of the path.
The camera is not following strictly the path. The path is converged to the edges. That makes the video smoother and there is no judder effect.
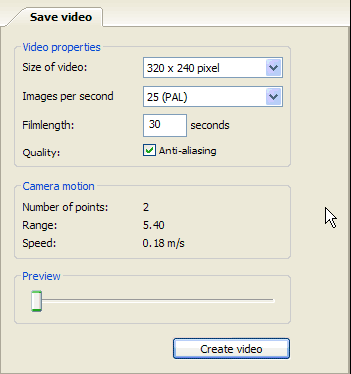
Fig. 444 Settings of the video
Besides the camera path and the camera viewing direction, also the video size the number of frames per second and the duration can be defined. The size defines the number of pixels in the X and Y direction on the screen. The higher the resolution, the more space is required to save the video. If you want to prepare a presentation for a TV (DVD or S-VCD) you should select a standard resolution. In Europe the PAL format is common; in the US the NTSC format is used normally. Also the frame rate is defined in the standard format. The camera speed is defined by the film length, the frame rate and the length of the camera path. The speed along the camera path is constant. If anti-aliasing is selected, the quality of the video will be better but this function needs also some calculation time. In the field “camera motion” you can see a summary of the camera path and speed.
Moving the slider “Preview” brings the 3D CAD view into the position of the camera along the path. So you can check the resulting video before you have created it. If the DIALux project becomes bigger a good graphic card is absolutely necessary. We recommend a Nvidia graphic card with a memory of at least 128MB. If you are working in MESA mode and the DIALux project is complex (a lot of objects, a large area …) the 3D CAD will soon start to judder.
Clicking on “Create video” will open a Save As dialog. The location and the filename have to be selected here. After that a standard windows dialog appears where the user can select the video codec to compress the movie.
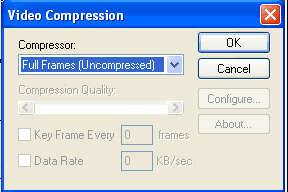
Fig. 445 Windows dialog for the video compression settings
In the drop down list all the codecs installed on the computer will be listed. These codecs are not installed by DIALux. The quality of the codec is responsible for the quality of the video. The better a codec is, the smaller the size of the file will be and the higher the quality of the video will be. Some of the codecs are free of charge. The codec has to be installed on the computer that creates the movie and on the computer that plays the movie. Microsoft XP already includes several codecs. These are available on all the XP machines if they were not deselected during the installation of the operating system. Some codecs are available from the internet. For example from here: www.divx.com or here: http://www.divx-digest.com/software/xvid.html . The last link leads to an open source project. The official site is here: http://www.xvid.org . Some of the codecs are offering a wide range of settings. Please click on settings to define the settings for the creation of the video. DIAL can not offer any support for the usage of a codec. NOTE a wrong codec or the selection of “uncompressed” full pictures will create a very large file size for the video. Start to test your codecs with small videos to find out which one and which settings are the best.Рейтинг: 0 Голосов: 0 14733 просмотраКомментарии (0)Manual
