- Главная
-
Учебник
- DIALux 4
- DIALux evo
- IES
- Форум
- Галерея
- Блоги
-
Скачать
- DIALux
- Базы
- Плагины
- 3D модели
- Текстуры
- Книги
-
Новости
The Output Tree
15 августа 2012 - АдминYet another tree structure exists for the output selection. You can open it by clicking on the Output tab in the Project manager or by selecting the icon in The Guide.

Fig. 46 Output Tab
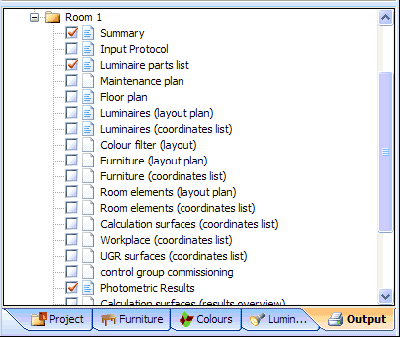
Outputs whose page icon is highlighted are immediately available. The output types which are not highlighted can only be obtained after the calculation has been done.

Fig. 47 Output tree
To view an output on the screen, double-click on the corresponding icon. To view multiple output types simultaneously, right-click an output icon and select Open in New Window. You can view all types of output on the screen. The output types which have a tick made in the checkbox are printed or displayed as print preview when the File → Print or File → Print Preview commands are used.
Please note:
The “Output” button in the Guide and the “Output” tab open the output tree
The observer position used in the CAD is used for the output 3D rendering.
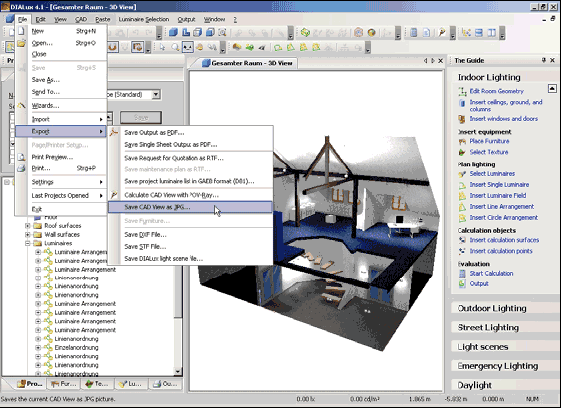
You may save the 3D rendering as a *.jpg picture. Just move the rendering into the required position and select in the menu File → Export → Save CAD view as JPG. Here you can select a directory and enter a filename.

Fig. 48 Save a 3D rendering as *.jpg fileРейтинг: 0 Голосов: 0 3823 просмотраКомментарии (0)Manual
