- Главная
-
Учебник
- DIALux 4
- DIALux evo
- IES
- Форум
- Галерея
- Блоги
-
Скачать
- DIALux
- Базы
- Плагины
- 3D модели
- Текстуры
- Книги
-
Новости
Direct3D as an alternative to OpenGL
17 августа 2012 - АдминDIALux uses the most modern techniques for visualisation of the lighting design. Before OpenGL or the MESA mode was used. Because several graphic card drivers, especially those from the “chip on board” cards, don’t have good support of OpenGL, DIALux is now also able to use Direct3D for the visualisation. Several graphic card drivers offer a better support for Direct3D than for OpenGL. We recommend working in OpenGL mode. If some problems in the visualisation or even crashes occur, you should switch over to Direct3D mode. If your graphics card doesn’t support this mode you will have to work in the MESA mode. This is the slowest mode but it is also the most reliable. The graphic mode can be selected from the Windows All Programs menu by selecting Start Options for DIALux or you can define the standard mode for your PC in file -> settings -> general options -> CAD window.

Fig. 64 Start options
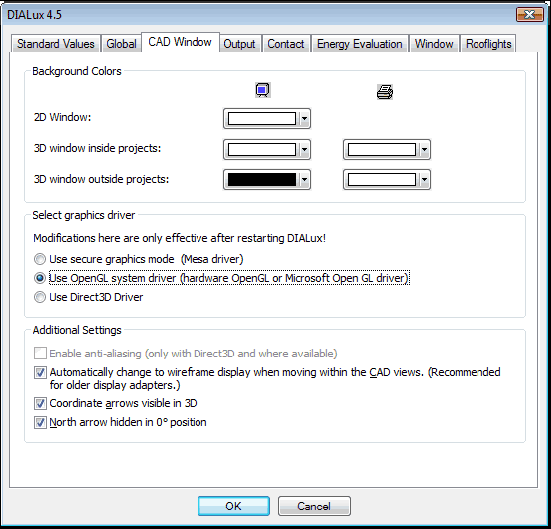
Fig. 65 Graphic mode
If you have an “older PC” it is advisable to select the Automatically change to wireframe display when moving within the CAD views option. If you move within the CAD while this option is activated, the room display is updated smoothly, following the mouse movement. After the mouse button is released, the entire scene is displayed again. Thus the calculation time is reduced and you can work with DIALux without disturbing “jerking” on the screen.
Hint: By default the upper setting is activated. If you have an “efficient” PC, it is worthwhile trying the deactivated function. We suggest you use OpenGL mode if possible.
If you want the X, Y and Z coordinate arrows to be visible in the 3D view, switch the Coordinate arrows visible in 3D option on. Since DIALux 4.1 you can hide the north arrow in 0° position.
In the Output tab you can adjust general settings for your output that appears on the relevant pages. You can specify font sizes and line thickness of the outputs in the Output tab.
Here you can modify the output footer and the logo. For the logo please click on the three-point-button besides the field Logo and then select the file in the opening window, which contains your logo. DIALux opens bitmaps (BMP) or JPG’s.

Fig. 66 General Options – Output
In the last tab Contact you can register your name and address. Here the address of the company doing the layout planning is entered. It appears in the output header. These entries are used in the Property Page of the project. Information about the operator is entered here too. This is then transferred in each new project.

Fig. 67 General Options – Contact
If the Customise function is selected, which you can access via menu File → Settings → Customize Toolbars and Keyboard, you can select the toolbars, which you need most frequently. As soon as you launch this function, you can alter the existing Toolbars. With the left mouse button you can drag the functions, which you do not need, into the Command tab. You can extract the functions, which you need, from the tab to the desired position. DIALux supports the standard Window’s Shortcuts, which you can launch by combinations of shortcut keys. You can specify additional combinations in the tab Shortcut Keys. The tab Options provides the option to select more settings in the menu.

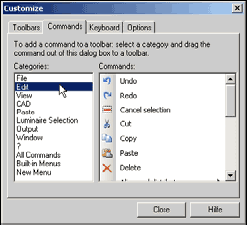
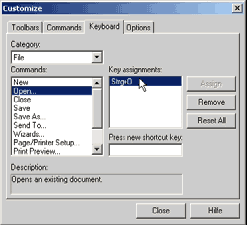
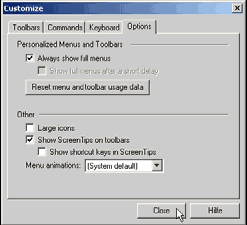
Fig. 68 Menu Customise
You can reset the user interface of DIALux in the menu "?" to restore the default setting at the next start of DIALux.
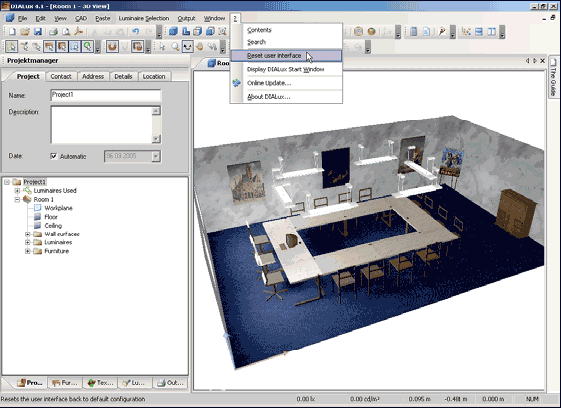
Fig. 69 Reset user interfaceРейтинг: 0 Голосов: 0 9997 просмотровКомментарии (0)Manual
