- Главная
-
Учебник
- DIALux 4
- DIALux evo
- IES
- Форум
- Галерея
- Блоги
-
Скачать
- DIALux
- Базы
- Плагины
- 3D модели
- Текстуры
- Книги
-
Новости
Insertion of luminaries with „vertical planar lighting”
20 августа 2012 - АдминThe procedure to insert a vertical planar lighting solution is the same as with direct planar lighting. Firstly one or more luminaries should be selected from the DIALux Database. Secondly these luminaries should be added to the actual project. By clicking the button “vertical planar lighting” in the DIALux toolbar you are able to create a vertical planar lighting solution.

Fig. 169 Selection of a vertical planar lighting situation
Alternatively you can insert a vertical planar lighting situation as well through “Paste / Luminaire Arrangement” in the DIALux Menu (see Figure 170).
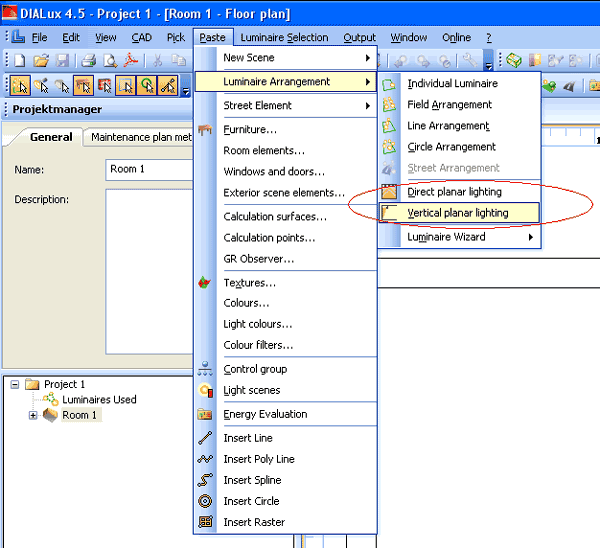
Fig. 170 Alternative solution to insert a vertical planar lighting situation
After clicking the button a project window opens. You are now able to draw a line which represents the arrangement of the selected luminaries. By clicking the left button of your mouse and simultaneously moving the mouse horizontally you are able to draw that particular line. By default every 1 meter a luminary will be positioned. The button “Paste” on the left side will execute the insertion of the selected luminaries.
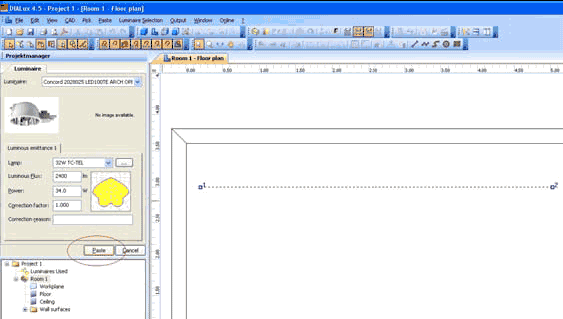
Fig. 171 Insertion of selected luminaries into the vertical planar lighting solution
As well as at direct planar lighting solutions the project manager provides you with several possibilities to modify settings individually. Amongst others you are able to make changes in Mounting Height (Figure 172.1), Arrangement of luminaries (Figure 172.2) and Rotation of single luminaries (Figure 172.3).
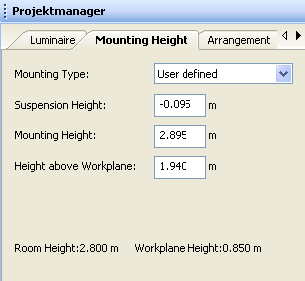
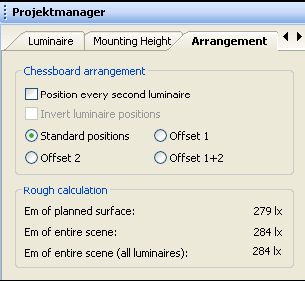
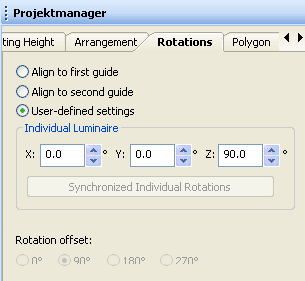
Fig. 172 Changes in Mounting Height (1), Arrangement of luminaries (2) and Rotations of single luminaries (3) at vertical planar lighting solutions
By clicking the right button of your mouse within the actual room you are able to adjust the axes. The axes are blue and red doted. The luminaries are positioned on that axes. To shift the two different axes simply click left directly onto the axis and shift it at the same time by moving the mouse upwards or downwards.
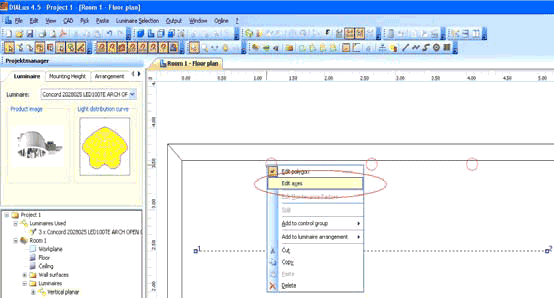
Fig. 173 Editing the single axes – vertical planar lightingРейтинг: 0 Голосов: 0 4604 просмотраКомментарии (0)Manual
