- Главная
-
Учебник
- DIALux 4
- DIALux evo
- IES
- Форум
- Галерея
- Блоги
-
Скачать
- DIALux
- Базы
- Плагины
- 3D модели
- Текстуры
- Книги
-
Новости
The Colours Tree (since version 4.3, formerly Texture Tree)
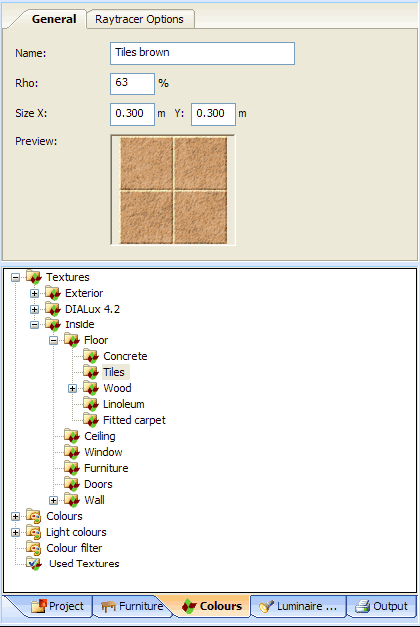
15 августа 2012 - АдминYou can use the Colours tree to modify the properties of surfaces via drag and drop - similar to inserting furniture into a room. In the textures tree you find predefined textures (surface pictures), RAL colours and you have the option to organise your own textures. You can move and copy textures from one folder / directory to another. Also you can create new folder and you can delete existing ones. All this is available by a right click on the texture or the folder.
The subfolder Light colours and Colour filter will be explained in the chapter Light Colours.

Fig. 45 The Colour tree
When you select a texture in the texture tree, the Inspector shows a preview of it. After the import the reflection is calculated according to the RGB-values of the texture. You may modify this value later. It is important to specify the real size of the texture. The default value is 1 x 1 m. If you take a photo for example of a building’s facade and import this photo as a texture, you have to enter the real size of the building (length and height). After you drag a texture onto a surface, you may modify it (scale, rotate,…). Once a texture is placed on a surface, you can flip /mirror it by entering a negative length (e.g. -0.4m). This will only be used for the selected surface.Рейтинг: 0 Голосов: 0 3164 просмотраКомментарии (0)Manual
