- Главная
-
Учебник
- DIALux 4
- DIALux evo
- IES
- Форум
- Галерея
- Блоги
-
Скачать
- DIALux
- Базы
- Плагины
- 3D модели
- Текстуры
- Книги
-
Новости
Generate a project with light scenes and control groups
20 августа 2012 - АдминInsert a new room and adapt all settings in the accompanying Property Pages (see chapter Edit Room Data). Subsequent you can insert the luminaires which you would like to use in your project. Select those which you want to assign to a control group. If you have inserted a luminaire field, you should activate the function "Allow single luminaires selection", because the possibility exists to select single luminaires. DIALux offers the option to add your luminaire arrangement(s) to one or several control groups. In the menu → Paste → Control group, as well as in the context menu in the CAD window or in the Project manager you can add your selected luminaire(s) to a new or existing control group.

Fig. 189 Paste a control group via menu
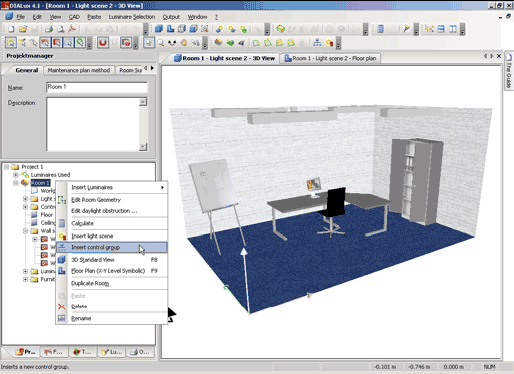
Fig. 190 Paste a control group – Context menu of the room
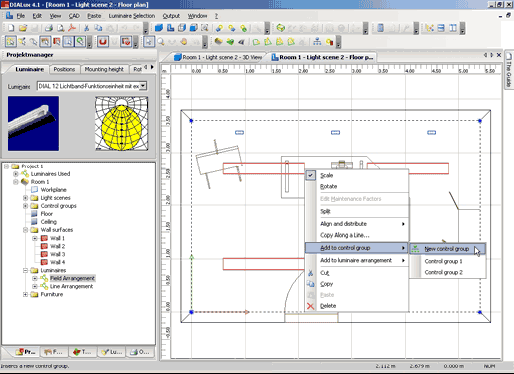
Fig. 191 Paste a control group – Context menu in the CAD view
Then in the Project manager the control group appears with a link to the luminaires. The control group has the Property Page Name.
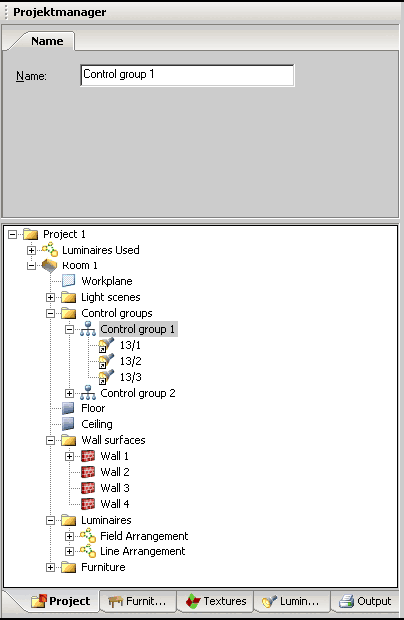
Fig. 192 Property Page of a control group
If luminaires are deleted, these are also removed at the same time from the appropriate control group, provided that these belong to a control group.
In the menu Paste you can insert a light scene in your project.
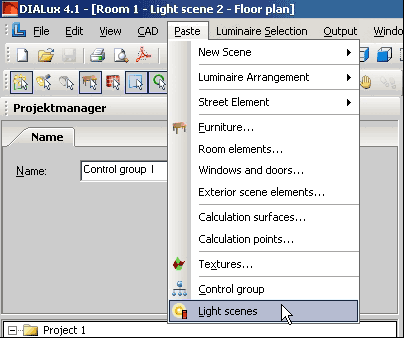
Fig. 193 Insert a light scene via menu
Alternatively you have the option to insert a light scene from the context menu of the room.
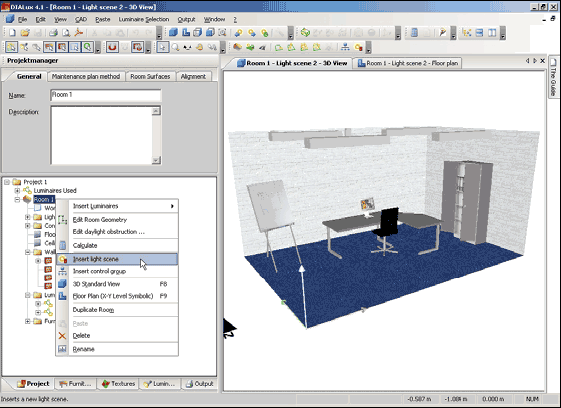
Fig. 194 Context menu of the room – Insert a light scene
If a control group was inserted already, you can access it by a right-click on the respective control group for the context menu and then add a new light scene. In fig 163 the suitable control group already exists.
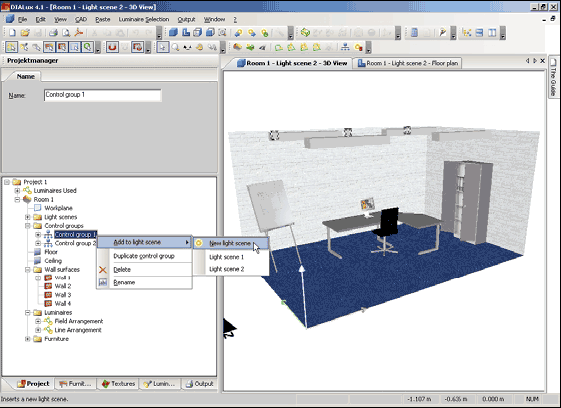
Fig. 195 Context menu control group – Add to light scene
If you select the light scene in the Project manager, the accompanying Property Pages open. The same happens to the control group available in the light scene. The Property Page light scene contains the name of the light scene which you can customise. DIALux has the option to define light scenes as an emergency light scene and to include the first reflection on the ceiling in the calculation (LG 12). You can make these adjustments in the checkboxes of the light scene Property Page.
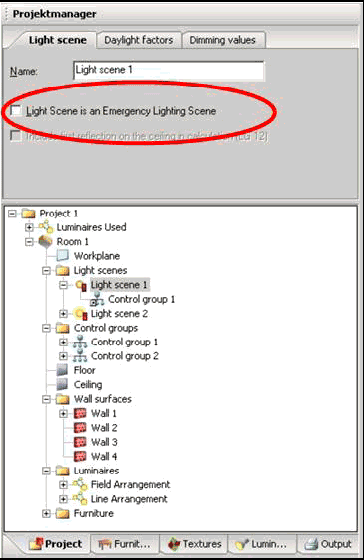
Fig. 196 Property Page of a light scene – Light scene
The Daylight factors tab enables the determination of the position of the sun for the daylight calculation. You have the option to make various settings in the Inspector with respect to daylight. Activate the checkbox Take daylight into account during calculation, that way you include the daylight in your project. If the checkbox is deactivated, the room is calculated without daylight. Individual or all light scenes of a room can be calculated at the same time.
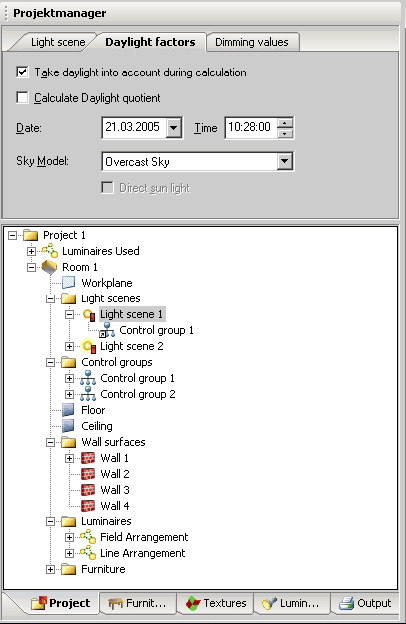
Fig. 197 Property Page of a light scene – Daylight factors
In the Property Page Dimming values the control groups with dimming levels are set in an editable list.
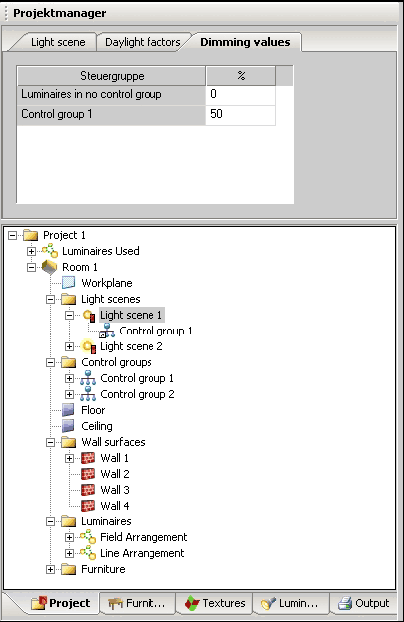
Fig. 198 Property Page of a light scene – Dimming values
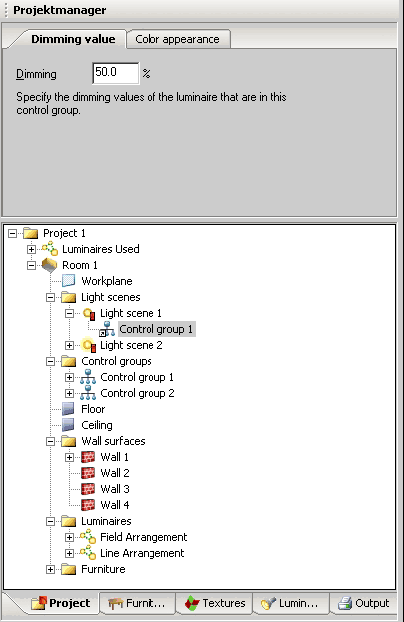
Fig. 199 Property Page of a control group – Dimming values
The user has the option to make set dimming levels of the used luminaires visible in the CAD view and to edit in the appropriate Property Pages. By means of the icons in the menu bar the dimming levels can be switched on and off. Also there is the option to change between individual light scenes with the arrows, provided that several light scenes exist.

Fig. 200 Icons for showing dimming values and light scenes in CAD
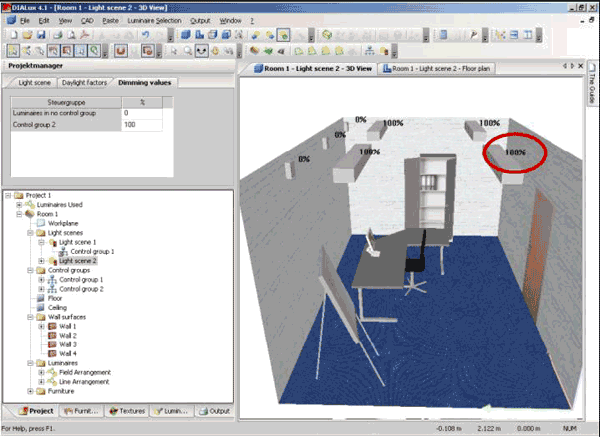
Fig. 201 Viewable dimming values in CAD
If luminaires with more than one light output are used, the dimming values for each light emitting object (LEO) can be adjusted separately. In the Property Page of the control group in the lighting scene, you can define the dimming values for each LEO. This dimming value will be multiplied with the dimming value of the control group.
Example:
The control group will be dimmed to 100%. In this control group there is a luminaire with independent direct and indirect light output. The direct light should be switched off; the indirect light should be completely on.
Settings:
Dimming value of the control group: 100%
Light output direct: 0%
Total: 100% x 0% = 0%
Light output indirect: 100%
Total: 100% x 100%= 100%
If the indirect light should be dimmed to 50%, you can either dim the control group or the LEO.
Either:
Total: 50% x 100% = 50%
Or
Total: 100% x 50% = 50%
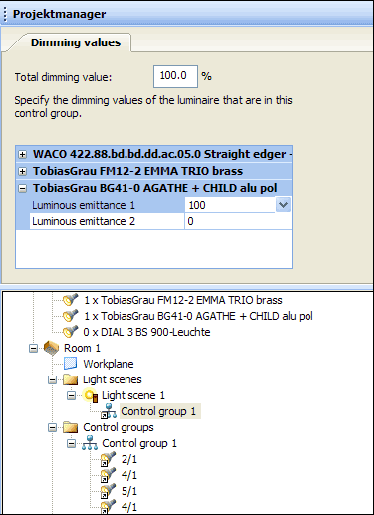
Fig. 202 Dimming individual light outputs separately
If no light scene is inserted in the room, only the room is calculated as before.Рейтинг: 0 Голосов: 0 16279 просмотровКомментарии (0)Manual
